
Getting Started With Avalanche
Market Recap

Volatile Week For Assets

Getting Started With Avalanche
Previously we have spoken about the blockchain trilemma and what it entails when designing your own blockchain.
Because this trilemma exists, it means that inevitable trade-offs need to be made between decentralisation, security and scalability. This has led to the rise of many different layer 1 blockchains that have been optimised to achieve a specific outcome, namely scalability. However, this has come at the detriment of decentralisation.
A few chains have taken very different approaches, and one of these is Avalanche.
What is Avalanche?
Avalanche is a smart contract platform that is very similar to Ethereum in that it can power a wide variety of applications; these can be anything from DeFi to Web3. Avalanche is also compatible with Solidity (the programming language used by Ethereum), so it is straightforward for Ethereum developers to move over and start creating applications on Avalanche. Avalance's design, however, is vastly different from that of Ethereum and attempts to improve scalability while trying to maintain decentralisation by distributing its network over three blockchains.
How Does Avalanche Work?
This part can be technical, so we will try to keep it simple.
Avalanche has three interoperable blockchains: The X-Chain, C-Chain, and P-Chain, which all work together to create the final Avalanche network.
1) The Exchange Chain (X-Chain)
This chain uses the Avalanche consensus protocol to create and exchange the AVAX token and other digital assets. These tokens or assets all have their own unique rules, just like the Ethereum token standards. This chain is only used for the transfer of tokens; you cannot interact with things like DeFi smart contracts on this chain.
2) The Contract Chain (C-Chain)
This chain uses an altered version of the Avalanche consensus protocol called Snowman. It is where developers create the smart contracts for the Avalanche dApps. Because the chain is Ethereum Virtual Machine (EVM) compatible, developers can easily copy Ethereum dApps onto Avalanche. If you want to use Avalanche for DeFi or other dApps, this is the chain you use.
3) The Platform Chain (P-Chain)
This chain also uses the Snowman consensus protocol and is responsible for coordinating network validators, tracking subnets, and creating new subnets. This is the chain you would use if you were looking to stake AVAX.

Avalanche has approached blockchain design very differently than many other existing examples. In the last few months, it has found significant traction and has emerged as a leader amongst smart contract platforms.
How to Use Avalanche
An Avalanche wallet has three different types of addresses, one for the X, C and P-chain, respectively. Each chain has a very specific purpose, as explained previously, and it is essential that you do not send your assets to the wrong chain as they may be lost forever.
The Avalanche Wallet helps you store and move your assets between each chain, and some other wallets like MetaMask or Trust Wallet are compatible with the C-Chain specifically.
Addresses on the X-Chain start with "X" P-Chain addresses start with "P", however, C-Chain addresses start with "0x", just like an Ethereum address. This makes them easy to recognise and should help with identifying the appropriate address.
Creating an Avalanche Wallet
Step 1: Visit the Avalanche Wallet Website
Go to the Avalanche Wallet Website
Make sure the URL you land on is "wallet.avax.network"
You should see the below screen

Click CREATE NEW WALLET
Step 2: Generate a Seed/Key Phrase
Your seed/key phrase is how you recover access to your account if something happens to your wallet. Therefore, it is crucial to concentrate during the next few steps.
Click GENERATE KEY PHRASE
You will now be given your list of 24 words as below:

We have previously written about the importance of storing a key phrase correctly. You can access that article here to follow best practices. Copy your 24 words down in order and ensure that they are accurate, store them as suggested in our article. You can never be too careful with your seed phrase.
Once you have copied them down on a piece of paper:
Click ACCESS WALLET
You will now be required to verify the words you have just written down
Click VERIFY
Congrats! You have successfully created your Avalanche Wallet
Click ACCESS WALLET
Step 3: Use your Wallet
You will now have access to your wallet dashboard, which should look like the one below:
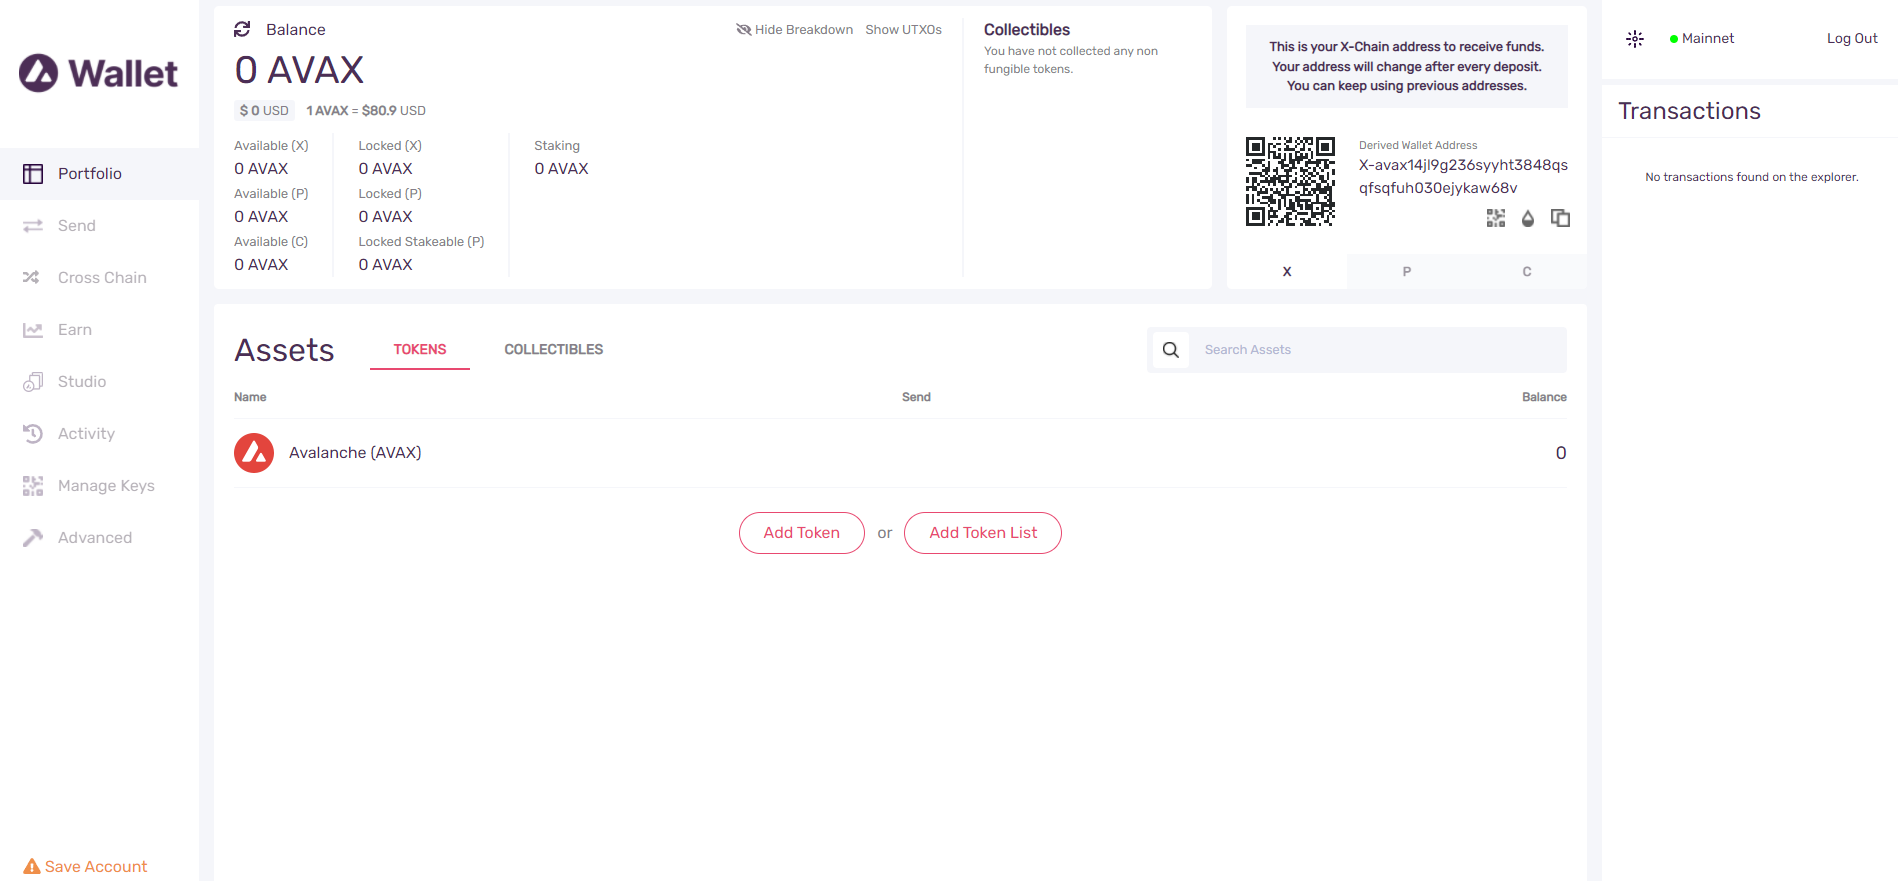
You can now control all of your AVAX under one unified dashboard and move it between chains. You can see your specific address for each chain on the top right by clicking through them.
Funding Your Wallet
Funding your wallet can be done in different ways, namely through an exchange or through a cross-chain bridge.
Exchange
You can fund your wallet directly using an exchange like Binance or any other exchange that offers AVAX as a trading pair. This will differ from exchange to exchange, so giving specifics is hard. But it will involve you withdrawing the AVAX token directly to your Avalanche Wallet that you have just set up. You will want to copy the X-Chain address from your Avalanche Wallet and use those details to withdraw the AVAX token from the exchange. Always double-check that the address you are sending to matches the one from your wallet exactly and that the exchange is sending your assets on the X-Chain. Sending to the wrong address will mean you lose access to your funds.
Cross-Chain Bridge
This process has a couple more steps and involves setting up a MetaMask wallet. You can follow our guide to setting up your MetaMask here. This will also be necessary if you plan to use DeFi and Web3 projects on the Avalanche network anyway.
Step 1: Add Avalanche C-Chain To MetaMask
Adding a custom chain to MetaMask is relatively straightforward. You can see a detailed explanation here under Step 3.
However, to add C-Chain to MetaMask, simply go into Settings -> Networks -> Add a Network, and paste the following details:
Network Name: Avalanche Network
New RPC URL: https://api.avax.network/ext/bc/C/rpc
ChainID: 43114
Symbol: AVAX
Explorer: https://snowtrace.io/
Always ensure those details are entered exactly as above. This will be for the C-Chain as this is the only chain that works with the MetaMask wallet. Also, bear in mind this will have a different address from the C-Chain on your Avalanche Wallet. Using MetaMask is the easiest way to interact with DeFi and other Avalanche protocols as many don't recognise or allow you to connect to the Avalanche Wallet directly.
Step 2: Use Cross-Chain Bridge
Now you will need to bridge assets from the Ethereum network to the Avalanche C-Chain.
You should land on the following page:

Login to your MetaMask wallet
You will now see the following:
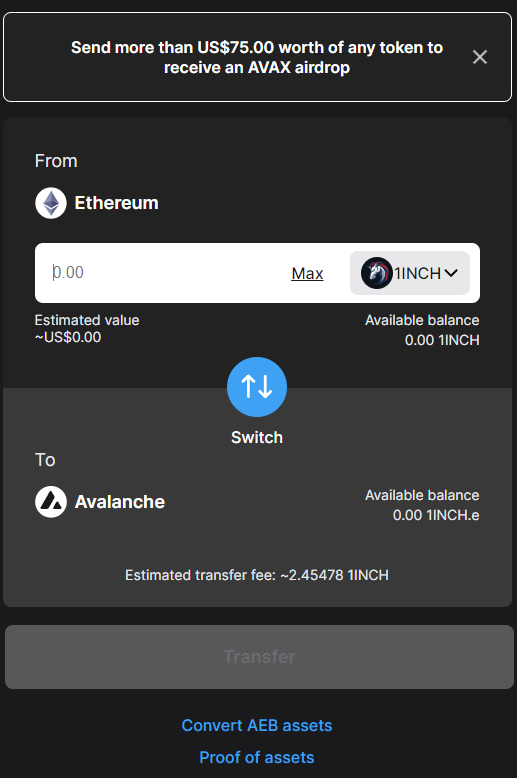
Select what asset you would like to move across. One thing that is usually recommended is sending the native asset of the destination chain (i.e. AVAX), as you will need to pay gas once the assets have transferred. However, Avalanche will currently give you some AVAX automatically if you transfer more than $75 worth of any token, allowing you to move the assets on the AVAX C-Chain.
Once you have selected the assets you plan on bridging, Click Transfer
Remember that you will have to pay the Ethereum gas fees to do this, which can be expensive. Confirm the transaction in your wallet, and the bridging process will start. For a full-length video guide of the bridging process, you can visit here.
This can take some time (35 Ethereum confirmations), so don't worry if the funds don't reflect right away. You may also need to manually add the token to the MetaMask wallet to make the token visible.
Step 3: Use Avalanche
Now that you have bridged your assets, you can use them in DeFi applications and other Web3 protocols. You can view a list of the projects you can use here.
You can now also move your tokens back to the C-Chain on your Avalanche Wallet if you want and move them between the X and P chains. Always make sure that whatever you are sending is compatible with the destination chain; otherwise, you can lose those assets forever.
Conclusion
Using these networks is the best way to learn about them. It shows and allows you to understand what blockchain networks are capable of. Each has its own unique advantages, disadvantages and user experiences.
Avalanche has employed a unique approach when it comes to layer 1 networks. This has allowed it to gain significant traction in the market and continually improve from a fundamental basis. We look forward to seeing how it continues to build in the future.
If you have any questions or have trouble using the network, please feel free to reach out and ask us questions. We always look forward to chatting with our readers. Otherwise, please feel free to share this article if you know anyone who is interested in using these networks.
Notable Articles and News Stories This Week:
Ethereum Gets an Upgraded Scaling Testnet – And It's Actually Years Ahead of Schedule
zkSync, a protocol responsible for implementing Ethereum scaling platforms, accomplished the unexpected yesterday, announcing the test network release of an Ethereum Virtual Machine compatible Zero-Knowledge rollup (zkEVM) years ahead of schedule.
The EVM is the environment in which all Ethereum wallets and contracts live and is responsible for defining the rules of the chain from block to block. The new test network is the first implementation of a ZK rollup capable of running the full Ethereum environment and will provide great insight into how capable zero-knowledge technology is at scaling blockchains.
Read more about the scaling solution here
Former Crypto CEO Denies Responsibility for $11 Billion Ethereum DAO Hack
A former cryptocurrency startup CEO has denied stealing an Ethereum stash that today would be worth more than $11 billion, allegations made against him in an article published by Forbes.
Journalist Laura Shin has accused Toby Hoenisch, co-founder and CEO of crypto debit card company TenX, of being behind the 2016 hack of The DAO—one of the largest cryptocurrency hacks ever.
The DAO was one of the world's first decentralized autonomous organizations, serving as an open-source venture fund platform for crypto projects. It raised 12.7 million ETH, worth around $150 million at the time, from crowdfunding.
When it was hacked in 2016, someone siphoned off nearly a third of the project's funds. Shin, in a joint investigation with blockchain analytics firm Chainalysis, tracked the movement of the stolen funds, which she says led her to Hoenisch.
Read more about the hack here
Federal Reserve Officials Banned From Owning Cryptocurrencies, Stocks After Public Outcry
As US regulators hone in on digital assets, senior Federal Reserve officials will no longer be allowed to trade individual cryptocurrencies.
On the heels of public pressure to reign in trading practices, the new Fed rules — first broached in October — ban senior officials from purchasing individual stocks or sector funds, as well as from holding cryptocurrencies, commodities and foreign currencies.
Executives must give 45 days notice before buying or selling a security, which they cannot later reverse. The 12 Fed regional bank presidents will be required to publicly disclose securities transactions 30 days in advance.
The rules “aim to support public confidence in the impartiality and integrity of the Committee’s work by guarding against even the appearance of any conflict of interest,” the Fed said in a Friday statement.
Read more about the announcement here
Whilst we all have the option to look, to seek to understand, it’s often easier not to. Bitcoin, Ethereum and distributed ledger technology are complex systems that require significant due diligence. At Etherbridge, we aim to lower the barriers to understanding this fast-growing digital economy.
If you are interested in staying up to date, please subscribe to our newsletter at etherbridge.co
This is not financial advice. All opinions expressed here are our own. We encourage investors to do their own research before making any investments.
